Paneer Makhani Recipe: Restaurant-Style Butter Paneer in 30 Minutes with Pro Tips
Published: March 20, 2026 | Category: Indian Recipes | Reading Time: 6 minutes
Why This Paneer Makhani Recipe Works Every Time
Paneer Makhani, also known as Butter Paneer, is one of the most popular dishes in Indian cuisine. This creamy, rich curry is a favorite at restaurants worldwide, and many believe it’s difficult to recreate at home.
However, with the right technique and ingredients, achieving restaurant-quality Paneer Makhani is entirely possible. This recipe has been tested multiple times to ensure consistent results.
The key difference between average homemade paneer makhani and restaurant-style lies in three factors: the smoothness of the gravy, the balance of spices, and the quality of dairy products used. This recipe addresses all three aspects systematically.
Quick Recipe Information
⏱️ Prep Time: 15 minutes
👨🍳 Cook Time: 25 minutes
⏰ Total Time: 40 minutes
🍽️ Servings: 4 people
🌶️ Difficulty Level: Easy to Medium
💰 Estimated Cost: $8-10
Required Ingredients
Main Ingredients for Gravy:
- Tomatoes – 5 medium-sized, ripe
- Butter – 4 tablespoons (salted or unsalted)
- Cashew nuts – 10-12 pieces (Substitute: 3 tablespoons heavy cream)
- Onion – 1 large, roughly chopped
- Ginger-Garlic paste – 1.5 tablespoons
- Green chili – 1 (optional)
- Cooking oil – 1 tablespoon
Spice Mix:
- Kashmiri red chili powder – 1 teaspoon (provides color without excessive heat)
- Garam masala powder – 1 teaspoon
- Coriander powder – 1 teaspoon
- Kasuri methi (dried fenugreek leaves) – 1 tablespoon
- Sugar – 1 teaspoon
- Salt – according to taste
For Paneer:
- Paneer (Indian cottage cheese) – 400 grams, cut into cubes
- Fresh cream – 1/2 cup (Substitute: Greek yogurt, though cream provides better taste)
For Garnish:
- Fresh cream – 2 tablespoons
- Coriander leaves – fresh, chopped
- Butter – 1 tablespoon
Step-by-Step Preparation Method
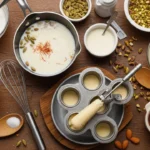
Step 1: Tomato Preparation
Begin by blanching the tomatoes. Boil water in a large pot. Make a small cross-shaped incision at the bottom of each tomato using a knife.
Place tomatoes in boiling water for exactly 2 minutes. Remove and immediately transfer to ice-cold water. This process loosens the skin, making it easy to peel.
Peel the tomatoes completely and chop them into quarters. Proper peeling ensures a smooth, restaurant-quality gravy texture.
Step 2: Cooking the Base
Heat a heavy-bottomed pan or kadhai over medium flame. Add butter and oil together. The combination prevents butter from burning at high temperatures.
Once butter melts and begins to foam, add chopped onions. Sauté for 5-6 minutes until onions become translucent. Avoid browning the onions as it changes the final color of the dish.
Add ginger-garlic paste and sauté for 1 minute until the raw aroma disappears. If the mixture begins sticking, add a tablespoon of water.
Step 3: Cooking Tomato Mixture
Add chopped tomatoes, cashew nuts, and green chili (if using) to the pan. Mix all ingredients thoroughly.
Cook this mixture on medium heat for 10-12 minutes. The tomatoes should break down completely and become mushy. Proper cooking at this stage is essential for developing the base flavor.
The mixture is ready when oil begins separating from the sides and the raw tomato smell is completely gone.
Step 4: Blending Process
Turn off the heat and allow the mixture to cool for 5-7 minutes. Blending hot liquids can be hazardous.
Transfer the cooled mixture to a blender. Blend on high speed for 2-3 minutes until completely smooth with no visible chunks.
Strain the blended mixture through a fine-mesh sieve back into the cooking pan. This additional step ensures restaurant-level smoothness.
Step 5: Adding Spices
Turn heat to medium. Add Kashmiri red chili powder, garam masala, and coriander powder to the strained gravy. Mix thoroughly to combine all spices evenly.
Add salt and sugar. The sugar balances the natural acidity of tomatoes, creating a well-rounded flavor profile.
Allow the gravy to simmer for 5 minutes. It will thicken slightly and develop a deeper orange-red color.
Step 6: Incorporating Dairy
Add the remaining 2 tablespoons of butter to the gravy. Stir until completely melted and incorporated.
Reduce heat to low. Slowly pour fresh cream while stirring continuously. Low heat prevents cream from splitting or curdling.
The gravy will transform into a beautiful peachy-orange color, indicating proper cream incorporation.
Step 7: Adding Kasuri Methi
Take kasuri methi (dried fenugreek leaves) in your palm. Rub between both palms to crush slightly before adding to the gravy.
Crushing releases essential oils and enhances the aromatic properties. This technique significantly improves the final flavor.
Mix well and allow to simmer for 2 minutes on low heat.
Step 8: Adding Paneer
Gently add paneer cubes to the prepared gravy. Avoid vigorous stirring as paneer can break easily.
Allow paneer to simmer in the gravy for 3-4 minutes on low heat. This enables the paneer to absorb the flavors thoroughly.
Optional enhancement: Paneer cubes can be lightly pan-fried in butter before adding to gravy. This provides better texture and prevents breaking during cooking.
Step 9: Final Finishing
Turn off heat completely. Add 1 tablespoon of butter on top of the curry and allow it to melt naturally. This creates the signature glossy finish seen in restaurants.
Garnish with a decorative swirl of fresh cream and chopped coriander leaves.
Professional Tips for Perfect Results
🔥 Tip 1: Butter Quality Matters
Restaurant-quality Paneer Makhani requires generous butter usage. Using approximately 5-6 tablespoons total butter throughout the cooking process creates the authentic rich, velvety texture. Reducing butter quantity will compromise the final taste.
🔥 Tip 2: Kashmiri Chili Powder Selection
Regular chili powder creates excessive heat and dark red color. Kashmiri chili powder specifically provides vibrant orange-red color with minimal spiciness. This ingredient is available at Indian grocery stores and is worth purchasing for authentic results.
🔥 Tip 3: Cream Temperature Control
Always add cream on low heat while stirring continuously. High temperature causes cream proteins to separate, resulting in curdled appearance. If splitting occurs, immediately remove from heat and whisk in 2-3 tablespoons additional cream.
🔥 Tip 4: Flavor Development Time
Paneer Makhani tastes significantly better after resting for 2-3 hours or overnight refrigeration. The flavors meld together during this time. When reheating, add a splash of water if gravy becomes too thick.
Common Problems and Solutions
Problem 1: Gravy Too Acidic
Solution: Add an additional teaspoon of sugar and 2 tablespoons of cream. Mix thoroughly and taste. The acidity can also be reduced by ensuring tomatoes are fully ripe before cooking.
Problem 2: Cream Curdling in Gravy
Solution: This occurs when cream is added at high temperature. While curdled gravy cannot be completely fixed, whisk in 3-4 tablespoons of fresh cream off the heat to improve appearance. Prevention is key – always use low heat when adding dairy.
Problem 3: Thin, Watery Consistency
Solution: Simmer uncovered on medium heat for 5-7 minutes to evaporate excess moisture. Alternatively, mix 1 tablespoon cornstarch with 2 tablespoons water and add to gravy while stirring. This provides immediate thickening.
Problem 4: Lack of Flavor Depth
Solution: Insufficient cooking time for tomato base or missing kasuri methi often causes bland taste. Add more crushed kasuri methi, an extra tablespoon of butter, and simmer for 5 additional minutes. Verify salt levels as under-seasoning significantly impacts flavor perception.
Serving and Storage Guidelines
Best Accompaniments:
- Naan bread – traditional choice, especially butter naan
- Jeera rice – cumin-flavored basmati rice
- Tandoori roti – whole wheat flatbread
- Plain basmati rice – allows curry flavors to shine
- Kulcha – leavened Indian bread
Garnishing Options:
- Fresh cream swirl on surface
- Sprinkle of crushed kasuri methi
- Chopped fresh coriander
- Small butter cube melting on top
Storage Instructions:
Refrigeration: Store in airtight container for 3-4 days maximum. Ensure curry cools to room temperature before refrigerating.
Freezing: Can be frozen for up to 1 month. Avoid adding fresh cream before freezing – add when reheating instead.
Reheating: Use low to medium heat. Add 2-3 tablespoons water or milk if consistency becomes too thick. Avoid microwave reheating if possible – stovetop maintains better texture.
Frequently Asked Questions
Q1: Can packaged paneer be used or must it be homemade?
Store-bought paneer works perfectly well for this recipe. Ensure the package is fresh by checking the expiration date. For softer texture, soak paneer cubes in warm water for 10 minutes before adding to gravy. Homemade paneer is softer but requires additional preparation time.
Q2: Why does paneer become hard and rubbery?
Overcooking is the primary cause of hard paneer. Once added to gravy, paneer should simmer for only 3-4 minutes maximum. Extended cooking or high heat causes proteins to tighten, resulting in rubbery texture. Using fresh paneer also prevents this issue.
Q3: Can this recipe be made vegan?
Yes, complete vegan adaptation is possible. Replace butter with vegan butter or coconut oil, paneer with firm tofu (pressed and cubed), and dairy cream with full-fat coconut cream. The flavor profile will differ slightly but remains delicious.
Q4: How can this recipe be made healthier?
Reduce total butter to 2 tablespoons, replace cream with low-fat Greek yogurt, and add vegetables such as bell peppers or green peas for additional nutrition. While taste will differ from traditional restaurant version, it remains flavorful with significantly reduced calories and fat content.
Conclusion
This Paneer Makhani recipe delivers authentic restaurant-quality results when proper techniques are followed. The combination of smooth gravy preparation, precise spice balance, and appropriate dairy incorporation creates the signature taste and texture.
Success depends on attention to detail during tomato cooking, maintaining low heat when adding cream, and not skipping the kasuri methi. Following these guidelines ensures consistent, professional-quality results every time.
For optimal results, prepare this dish when time allows proper execution of each step without rushing. The investment in technique yields significantly superior flavor compared to shortcuts.