Kheer Recipe: Traditional Indian Rice Pudding in 40 Minutes with Perfect Consistency
Published: March 21, 2026 | Category: Indian Desserts | Reading Time: 7 minutes
Introduction to Authentic Kheer
Kheer, also known as rice pudding, stands as one of the most celebrated desserts in Indian cuisine. This creamy, aromatic dish features rice slowly cooked in milk until it achieves a thick, velvety consistency, then sweetened and flavored with cardamom, saffron, and nuts.
The primary challenge in preparing kheer lies in achieving the perfect consistency – neither too thick nor too watery – while preventing the milk from scorching at the bottom of the pan. Many home-cooked versions result in unevenly cooked rice grains or milk that curdles due to improper heat management.
This recipe addresses these common issues through specific techniques: proper rice preparation, controlled heat application, correct stirring intervals, and precise milk reduction timing. The method ensures consistent, restaurant-quality results with creamy texture and perfectly tender rice grains.
Traditional kheer preparation requires patience and attention, but following systematic steps makes the process manageable even for inexperienced cooks.
Required Ingredients
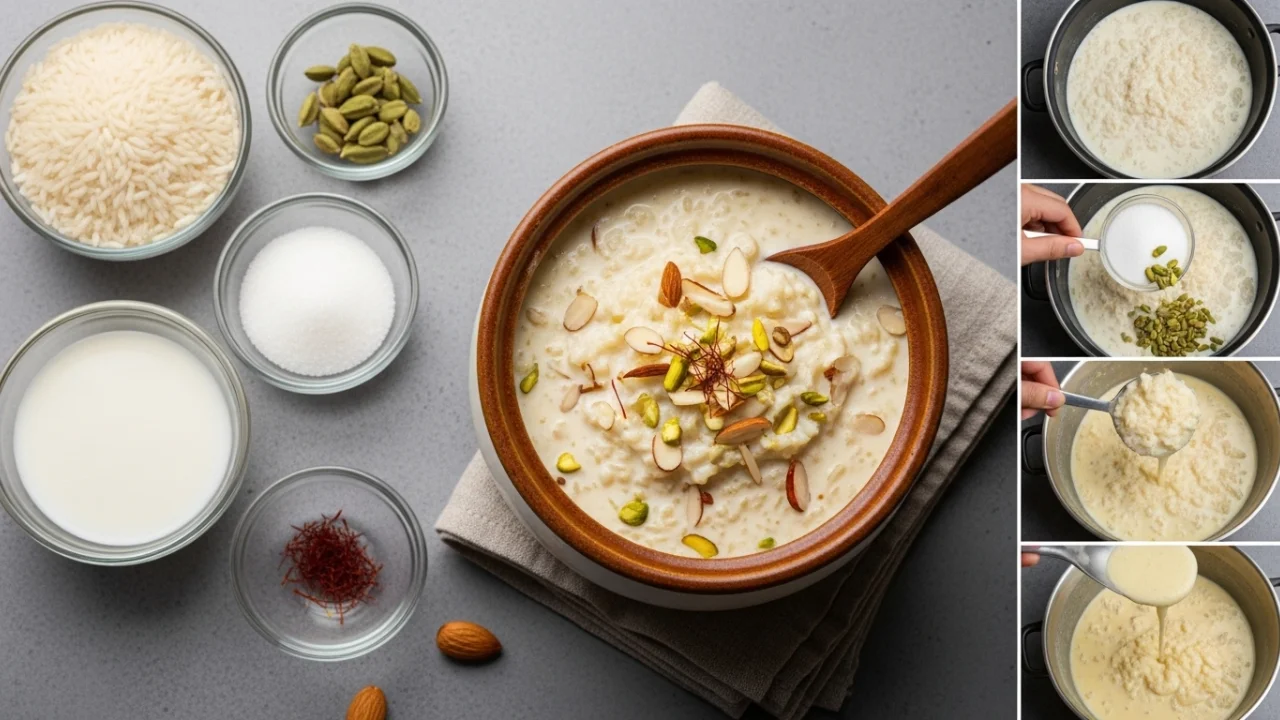
Main Ingredients:
- Basmati rice – 1/4 cup (Substitute: Any short-grain rice works, though basmati provides superior aroma)
- Full-fat milk – 1 liter (4 cups) (Substitute: 2% milk can be used but results in less creamy texture)
- Sugar – 1/2 cup or adjust to taste
- Water – 1/2 cup (for initial rice cooking)
Flavoring Agents:
- Cardamom powder – 1/2 teaspoon (freshly ground preferred)
- Saffron strands – 10-12 strands (Substitute: 1/4 teaspoon kesar essence, though natural saffron is superior)
- Rose water – 1 teaspoon (optional but recommended)
- Vanilla extract – 1/4 teaspoon (optional, adds depth)
For Garnish:
- Almonds – 10-12, blanched and slivered
- Cashews – 10-12, chopped
- Pistachios – 10-12, slivered
- Raisins – 2 tablespoons
- Charoli seeds – 1 tablespoon (optional, traditional garnish)
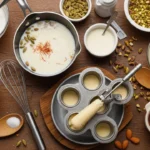
Kitchen Equipment Needed
- Heavy-bottomed pan or kadhai – Essential for preventing milk from scorching
- Long-handled wooden spoon – For stirring without scratching pan surface
- Small bowl – For soaking saffron
- Measuring cups and spoons – For precise measurements
- Strainer – For washing rice
- Serving bowls – Individual dessert bowls (6)
Step-by-Step Preparation Method
Phase 1: Rice Preparation
Step 1: Rice Washing and Soaking
Measure 1/4 cup basmati rice and place in a strainer. Rinse under running cold water for 2-3 minutes until water runs clear. This removes excess starch that can make kheer gummy.
Soak the washed rice in 1/2 cup water for 15-20 minutes. Soaking reduces cooking time and ensures even cooking. The rice grains will absorb water and expand slightly.
Technical note: Proper soaking allows rice to cook uniformly when added to milk, preventing hard centers in finished kheer.
Step 2: Saffron Preparation
While rice soaks, place 10-12 saffron strands in a small bowl with 2 tablespoons warm milk. Allow to steep for 10-15 minutes. The milk will turn golden yellow and develop aromatic properties.
Crushing saffron strands lightly between fingers before adding to milk releases more flavor compounds. This preparation step maximizes saffron’s contribution to color and taste.
Phase 2: Cooking Process
Step 3: Milk Heating
Pour 1 liter full-fat milk into heavy-bottomed pan. Place over medium-high heat. Bring milk to a boil, stirring occasionally to prevent skin formation on surface.
When milk begins boiling (bubbles form around edges), reduce heat to medium-low. Allow milk to simmer gently. This initial heating step pasteurizes milk and prepares it for rice addition.
Critical point: Never leave boiling milk unattended. Milk can overflow rapidly once it reaches boiling point.
Step 4: Rice Addition
Drain soaked rice completely. Add rice to simmering milk while stirring continuously. The temperature will drop temporarily – this is normal.
Increase heat slightly to medium and cook, stirring frequently. The rice will begin absorbing milk and softening. This process takes approximately 15-20 minutes.
Stirring technique: Scrape the bottom of pan with each stir to prevent rice from sticking and milk solids from burning. Stir every 2-3 minutes initially, then every minute as mixture thickens.
Step 5: Milk Reduction
As rice cooks, the milk volume will reduce gradually. The mixture will thicken and rice grains will become soft and translucent. Continue cooking on medium-low heat.
The kheer is progressing correctly when rice grains break easily when pressed between fingers and milk has reduced by approximately 30-40% from original volume.
Consistency check: The mixture should coat the back of a spoon but still flow freely. It will thicken further upon cooling, so avoid over-reducing at this stage.
Step 6: Sugar Addition
When rice is completely cooked (approximately 20-25 minutes after addition), add 1/2 cup sugar. Stir thoroughly to dissolve completely.
Sugar addition causes temporary thinning of kheer due to osmotic effects. Continue cooking for 5-7 more minutes, stirring frequently. The mixture will thicken again as sugar caramelizes slightly.
Sugar timing importance: Adding sugar too early interferes with rice cooking. Adding after rice softens ensures proper texture development.
Step 7: Flavoring
Add cardamom powder, saffron-infused milk (including strands), and rose water. Stir well to distribute flavors evenly throughout kheer.
Cook for 2-3 additional minutes, allowing flavors to meld. The kheer should have a pale yellow color from saffron and emit aromatic cardamom fragrance.
Remove from heat when desired consistency is achieved. Remember that kheer thickens considerably as it cools.
Phase 3: Nut Preparation and Garnishing
Step 8: Nut Roasting
Heat 1 teaspoon ghee or butter in a small pan over medium heat. Add almonds, cashews, and pistachios. Roast for 2-3 minutes, stirring constantly, until golden and fragrant.
Add raisins in the last 30 seconds – they will plump up immediately. Remove from heat and set aside.
Roasting purpose: This step develops nutty flavors and creates textural contrast with creamy kheer. Raw nuts lack the depth that roasting provides.
Step 9: Final Assembly
Reserve approximately one-third of roasted nuts for garnish. Add remaining two-thirds directly to hot kheer and stir gently.
Transfer kheer to serving bowls or large serving dish. Garnish top with reserved nuts, arranging them decoratively. Additional saffron strands can be placed on top for visual appeal.
Professional Techniques and Tips
🔥 Technique 1: Heat Management for Preventing Scorching
Maintaining consistent medium-low heat after initial boiling is critical for preventing milk from scorching. Heavy-bottomed cookware distributes heat evenly, reducing hot spots that cause burning. Constant stirring, especially along pan bottom, prevents milk solids from adhering and carbonizing. Scorched milk imparts bitter, unpleasant flavor that cannot be remedied.
🔥 Technique 2: Rice-to-Milk Ratio Precision
The standard ratio of 1:16 (rice to milk by volume) produces ideal consistency. This proportion allows rice to cook thoroughly while absorbing sufficient milk to become creamy. Excess rice results in porridge-like texture, while insufficient rice creates thin, watery kheer. Adjustments should be made in 1-tablespoon increments to maintain balance.
🔥 Technique 3: Evaporated Milk Enhancement
The slow evaporation of milk during cooking concentrates milk solids, creating natural sweetness and creamy mouthfeel characteristic of authentic kheer. This process, called “khoya formation,” develops complex flavors through mild caramelization. Rushing this step by using high heat or reducing cooking time produces inferior results lacking depth and richness.
🔥 Technique 4: Temperature Control for Serving
Kheer can be served warm, at room temperature, or chilled. Each temperature presents different textural characteristics. Warm kheer remains fluid and pourable. Room temperature kheer achieves medium thickness. Refrigerated kheer becomes quite thick and may require thinning with 2-3 tablespoons milk before serving. The flavor profile also changes – cold kheer tastes less sweet than warm due to temperature effects on taste perception.
Common Problems and Solutions
Problem 1: Kheer Too Thin/Watery
Cause: Insufficient cooking time or excessive milk quantity prevents proper reduction and thickening.
Solution: Continue cooking on medium-low heat for 10-15 additional minutes, stirring frequently. The mixture will gradually thicken as water evaporates. Alternatively, mix 1 tablespoon cornstarch with 2 tablespoons cold milk, add to kheer, and cook for 3-4 minutes while stirring.
Prevention: Measure ingredients precisely. Allow adequate cooking time for milk reduction. Remember that kheer thickens significantly when cooled, so slightly thin consistency while hot is acceptable.
Problem 2: Rice Grains Hard or Undercooked
Cause: Insufficient soaking time, inadequate cooking duration, or low heat prevents rice from softening properly.
Solution: If discovered while cooking, add 1/4 cup warm water, cover pan, and cook on low heat for 10 minutes. Steam will soften rice. If discovered after cooling, transfer to pan, add 1/3 cup milk, and reheat gently for 15 minutes.
Prevention: Soak rice for minimum 20 minutes before cooking. Ensure rice cooks for at least 20-25 minutes before adding sugar. Test rice grains periodically – they should break easily when pressed.
Problem 3: Milk Curdling or Splitting
Cause: Excessive heat, acidic additions, or poor-quality milk causes protein separation.
Solution: If curdling occurs, immediately remove from heat. Strain kheer through fine-mesh sieve to remove curdled particles. Return liquid to pan, add 1/4 cup fresh milk, and reheat gently. While texture will be affected, flavor remains acceptable.
Prevention: Use fresh, high-quality full-fat milk. Maintain medium-low heat after initial boiling. Avoid adding acidic ingredients like lemon juice. If milk quality is questionable, add 1/4 teaspoon baking soda to prevent curdling.
Problem 4: Burnt Milk at Bottom
Cause: Insufficient stirring or excessively high heat causes milk solids to adhere and burn.
Solution: If burning occurs, immediately transfer kheer to clean pan without scraping burnt portions. Burnt flavor will be present but minimized. No remedy exists for severe burning – kheer must be discarded.
Prevention: Use heavy-bottomed pan exclusively. Stir every 2-3 minutes throughout cooking. Maintain consistent medium-low heat. Never leave cooking kheer unattended for more than 5 minutes.
Serving Suggestions and Pairings
Traditional Serving Methods:
- Earthenware bowls (Mitti ke kulhad) – Traditional serving vessels that maintain optimal temperature and add subtle earthy notes
- Silver or stainless steel bowls – Premium presentation for special occasions
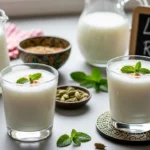
- Glass dessert cups – Modern presentation allowing visibility of garnish layers
Temperature Preferences:
- Hot kheer (50-60°C) – Served immediately after cooking, ideal for winter months
- Room temperature – Allowed to cool naturally for 1-2 hours, balanced flavor profile
- Chilled kheer (4-8°C) – Refrigerated for 2-4 hours, preferred for summer serving
Accompaniments:
- Pooris or puris – Deep-fried Indian bread, traditional combination
- Jalebi – Spiral-shaped sweet, creates sweet-on-sweet indulgent dessert
- Fresh fruit – Mango slices or pomegranate seeds add freshness and textural contrast
Festive Variations:
- Diwali presentation – Garnish with edible silver leaf (vark)
- Wedding serving – Individual portions in ornate bowls with elaborate nut garnish
- Temple offering (Prasad) – Simple preparation without excessive garnish
Storage and Reheating Instructions
Refrigeration:
Duration: Kheer remains fresh for 3-4 days when properly refrigerated.
Container: Store in airtight glass or plastic container. Avoid metal containers as they can impart metallic taste.
Storage method: Allow kheer to cool completely to room temperature before refrigerating. Do not cover while still warm as condensation forms, introducing excess moisture. Place plastic wrap directly on kheer surface before closing container to prevent skin formation.
Freezing:
Duration: Kheer can be frozen for up to 2 weeks, though texture changes occur.
Preparation: Transfer to freezer-safe container leaving 1-inch headspace for expansion. Freeze without nuts – add fresh roasted nuts when serving.
Thawing: Transfer to refrigerator 8-10 hours before serving. Thaw slowly to prevent texture deterioration.
Texture note: Frozen kheer separates slightly upon thawing. Whisk vigorously to re-emulsify before serving.
Reheating:
Stovetop method (recommended): Transfer refrigerated kheer to pan. Add 3-4 tablespoons milk for every cup of kheer. Heat on low flame, stirring constantly, for 5-7 minutes until warmed through. Do not boil.
Microwave method: Place in microwave-safe bowl. Add 2 tablespoons milk. Heat on 50% power for 1 minute, stir, then heat in 30-second intervals until desired temperature reached.
Texture restoration: If kheer becomes too thick after refrigeration, thin with milk gradually until desired consistency achieved.
Nutritional Information
Per Serving (approximately 3/4 cup):
Macronutrients:
- Calories: 280 kcal
- Protein: 8 g
- Carbohydrates: 42 g
- Fat: 9 g
- Fiber: 0.5 g
- Sugar: 28 g
- Sodium: 90 mg
Micronutrients:
- Calcium: 240 mg (24% Daily Value)
- Vitamin D: 1.2 mcg (6% DV)
- Vitamin A: 380 IU (8% DV)
- Iron: 0.6 mg (3% DV)
Health Considerations:
Dietary suitability: Naturally vegetarian and gluten-free. Suitable for lacto-vegetarian diets.
Allergen information: Contains dairy (milk) and tree nuts (almonds, cashews, pistachios). Not suitable for vegan, dairy-free, or nut-allergic individuals without modifications.
Diabetic adaptation: Reduce sugar to 1/4 cup and substitute with sugar-free sweetener. Use low-fat milk to reduce calorie content. Monitor portion size – limit to 1/2 cup serving.
Lactose intolerance: Use lactose-free milk as direct substitute. All other preparation remains identical.
Variations and Adaptations
Variation 1: Vegan Kheer
Replace dairy milk with full-fat coconut milk or almond milk. Coconut milk provides closest texture to traditional kheer. Use coconut sugar or maple syrup instead of refined sugar. Cooking time may reduce by 5-10 minutes due to different evaporation rates of plant-based milks.
Variation 2: Vermicelli Kheer (Seviyan)
Substitute rice with 1/2 cup roasted vermicelli (thin Indian noodles). Break vermicelli into 1-inch pieces. Reduce cooking time to 15-20 minutes total as vermicelli cooks faster than rice. All other ingredients and methods remain identical.
Variation 3: Fruit-Infused Kheer
Add 1/2 cup pureed mango or 1/4 cup crushed pineapple after sugar addition. Mango kheer is particularly popular in summer months. Fruit adds natural sweetness – reduce sugar by 2 tablespoons when adding fruit.
Variation 4: Low-Fat Healthy Version
Use 2% milk instead of full-fat. Reduce sugar to 1/3 cup. Add 2 tablespoons chia seeds for omega-3 fatty acids and additional thickness. Reduce nuts to 1 tablespoon total. Resulting kheer has 40% fewer calories and significantly lower fat content.
Frequently Asked Questions
Q1: Can kheer be made with other grains besides rice?
Yes, kheer can be prepared using various grains including broken wheat (dalia), pearl millet (bajra), or even quinoa for modern variations. Cooking times vary – broken wheat requires 30-35 minutes, while quinoa cooks in 20-25 minutes. The rice-to-grain ratio and milk quantity remain consistent across variations. Each grain imparts distinct flavor and textural characteristics.
Q2: Why does kheer taste less sweet when cold compared to when hot?
Temperature significantly affects taste perception. Warm foods enhance sweet taste receptors on the tongue, making sugar more perceptible. When kheer cools, this enhancement diminishes, creating perception of reduced sweetness. This is why cold desserts typically require more sugar than hot versions. To compensate, add an extra tablespoon of sugar if planning to serve kheer chilled.
Q3: How can kheer consistency be fixed if it becomes too thick after refrigeration?
Thick refrigerated kheer is easily adjusted by adding milk gradually while stirring. Start with 2-3 tablespoons milk per cup of kheer, stirring thoroughly. Add more milk in 1-tablespoon increments until desired consistency is achieved. If serving cold, thin slightly more than preferred consistency as it will thicken again when returned to refrigerator.
Q4: Is it necessary to use full-fat milk, or will low-fat milk work?
Full-fat milk produces superior results due to higher fat content that creates creamy texture and rich mouthfeel. Low-fat or skim milk can be used but results in less creamy, more watery kheer. The milk reduction process also takes longer with low-fat milk. For better results with low-fat milk, add 2-3 tablespoons heavy cream or evaporated milk to improve texture and richness.
Q5: Can kheer be prepared in a pressure cooker to save time?
Yes, pressure cooking reduces preparation time significantly. Combine washed rice, milk, and water in pressure cooker. Cook for 2 whistles on medium heat, then reduce to low and cook for 10 minutes. Release pressure naturally. Add sugar and flavorings, then simmer uncovered for 5 minutes. Total time reduces to approximately 25-30 minutes. Texture differs slightly from traditional method but remains acceptable.
Chef’s Notes and Additional Tips
Ingredient quality selection: Premium basmati rice provides superior aroma compared to regular rice varieties. The longer the grain, the more elegant the presentation. Aged basmati (1-2 years old) cooks more evenly and releases better fragrance.
Saffron authentication: Genuine saffron threads are dark red with slight orange tips. They should release color slowly when soaked. Cheap substitutes or artificial coloring produce bright yellow color immediately – avoid these products.
Seasonal variations: During mango season (April-June), fresh mango puree makes excellent addition. Winter months pair well with dried fruits like dates and figs. Monsoon season benefits from warming spices like cinnamon and nutmeg.
Make-ahead strategy: Kheer can be prepared 1 day in advance for parties or festivals. Prepare until garnishing step, refrigerate, and add fresh roasted nuts just before serving. This approach allows flavors to develop while maintaining nut crunchiness.
Scaling considerations: When doubling recipe, increase cooking time by 10-15 minutes due to larger milk volume. When halving recipe, reduce cooking time by 5-7 minutes. Maintain stirring frequency regardless of batch size.
Conclusion
Successful kheer preparation depends primarily on three factors: patient milk reduction, proper heat management, and precise ingredient ratios. The slow cooking process cannot be rushed without compromising texture and flavor development.
This traditional dessert works equally well for everyday family meals and special celebration occasions. The versatility in serving temperature and numerous variation possibilities make kheer adaptable to different preferences and dietary requirements.
Following these systematic techniques ensures consistent results that match or exceed restaurant-quality kheer. Proper attention to stirring frequency and heat control prevents common issues while producing the characteristic creamy texture and aromatic profile expected in authentic Indian rice pudding.