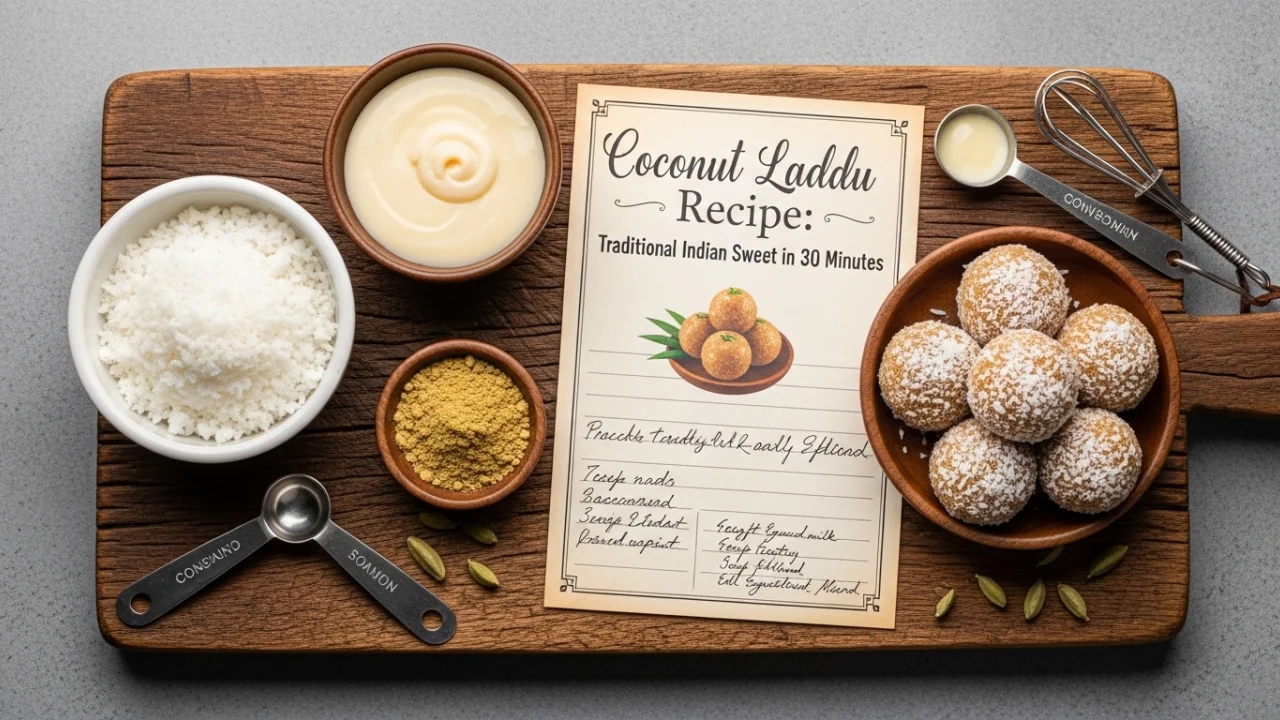
Coconut Laddu Recipe: Traditional Indian Sweet in 30 Minutes – Easy Homemade Method
Published: March 21, 2026 | Category: Indian Desserts | Reading Time: 6 minutes
Introduction to Coconut Laddu
Coconut Laddu represents one of the simplest traditional sweets in Indian cuisine. These round, sweet coconut balls are prepared across India, particularly during festivals like Ganesh Chaturthi, Diwali, and Navratri. The dessert features freshly grated coconut combined with condensed milk or sugar, then shaped into small balls.
The main challenges in preparing coconut laddu at home include achieving proper moisture balance for binding, preventing the mixture from becoming too dry or wet, and creating uniform shapes that hold together. Many home versions result in either overly sticky balls or dry, crumbly ones that fall apart.
This recipe addresses these issues through specific techniques: correct coconut-to-sweetener ratio, controlled cooking time, systematic moisture management, and proper shaping methods. Following these approaches ensures consistent, professional-quality results with ideal texture.
The preparation requires minimal ingredients and simple cooking techniques, making it accessible even for beginners.
Recipe Overview
| Parameter | Details |
|---|---|
| Cuisine Type | Indian |
| Course | Dessert |
| Difficulty Level | Easy |
| Prep Time | 10 minutes |
| Cook Time | 15 minutes |
| Total Time | 25-30 minutes |
| Servings | 20-25 pieces |
| Calories per Piece | Approx. 75 kcal |
| Dietary | Vegetarian |
| Estimated Cost | $4 – $6 |
Required Ingredients
Main Ingredients:
- Fresh grated coconut – 2 cups (Substitute: desiccated coconut, though fresh provides better taste)
- Condensed milk – 3/4 cup (Substitute: 1 cup sugar + 1/4 cup regular milk)
- Milk powder – 1/4 cup (adds binding and richness)
- Ghee (clarified butter) – 2 tablespoons
- Cardamom powder – 1/2 teaspoon
Optional Additions:
- Cashews – 10-12 pieces, finely chopped
- Almonds – 10-12 pieces, chopped
- Pistachios – 8-10 pieces, for garnish
- Saffron strands – 8-10, soaked in warm milk
- Rose water – 1/2 teaspoon
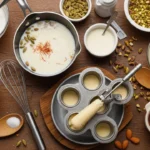
Kitchen Equipment Needed
- Heavy-bottomed pan
- Wooden spatula
- Mixing bowl
- Grater (if using fresh coconut)
- Storage container
Step-by-Step Preparation Method
Phase 1: Preparation
Step 1: Coconut Preparation
If using fresh coconut, grate it finely using a box grater. Fresh coconut provides superior taste and aroma compared to dried varieties. For store-bought desiccated coconut, measure 2 cups and optionally soak in 2 tablespoons milk for 5 minutes to rehydrate.
Ensure coconut is finely grated. Coarse pieces make shaping difficult and create uneven texture in final product.
Phase 2: Cooking Process
Step 2: Roasting Coconut
Heat heavy-bottomed pan over medium-low heat. Add ghee and allow to melt completely.
Add grated coconut to the pan. Stir continuously for 3-4 minutes. The coconut should release aroma and turn slightly golden. This step removes excess moisture and enhances flavor.
Constant stirring prevents burning. Coconut burns quickly due to sugar content, so attention is required during this stage.
Step 3: Adding Sweetener
Add condensed milk to the roasted coconut. Stir thoroughly to combine. The mixture will appear wet initially.
If using sugar instead of condensed milk, add sugar along with 1/4 cup regular milk. Stir until sugar dissolves completely before proceeding.
Add cardamom powder at this stage. Mix well to distribute flavor evenly throughout the mixture.
Step 4: Cooking to Right Consistency
Continue cooking on low-medium heat for 8-10 minutes, stirring constantly. The mixture will gradually thicken as moisture evaporates.
Watch for these signs of proper consistency:
- Mixture starts leaving sides of the pan
- Forms cohesive mass when stirred
- Appears glossy but not sticky
- When pressed between fingers, holds shape without excessive sticking
This is the most important step. Undercooked mixture won’t bind properly. Overcooked mixture becomes too dry and crumbles.
Step 5: Optional Nut Addition
If using chopped cashews and almonds, add them in the last 2 minutes of cooking. Stir well to distribute nuts evenly.
Turn off heat when mixture reaches proper consistency. Allow to cool for 2-3 minutes before shaping. The mixture should be warm but comfortable to handle.
Phase 3: Shaping Laddus
Step 6: Forming Balls
Apply small amount of ghee to palms. This prevents sticking and makes shaping easier.
Take approximately 1.5 tablespoons of warm mixture. Roll between palms using gentle but firm pressure to form smooth, round ball.
Each laddu should be approximately 1.5 inches in diameter. Uniform size ensures even appearance and makes serving portions consistent.
Place shaped laddus on plate, ensuring they don’t touch each other until completely cooled.
Important: Work quickly while mixture is warm. As it cools, it becomes harder to shape and may not bind properly.
Step 7: Garnishing and Cooling
Press one pistachio sliver or small cashew piece on top of each laddu for decoration. This is optional but improves presentation.
Allow laddus to cool completely at room temperature for 30 minutes. They will firm up during cooling, making them easier to handle and store.
Professional Techniques and Tips
Technique 1: Fresh vs. Desiccated Coconut
Fresh coconut contains natural moisture and oils that create superior taste and texture. The moisture content varies based on coconut age. Younger coconuts have more moisture, requiring longer cooking time. Older coconuts are drier and need less cooking. Adjust cooking time based on moisture content observed during preparation.
Technique 2: Continuous Stirring Importance
Constant stirring serves multiple purposes: prevents mixture from sticking and burning, ensures even heat distribution, helps moisture evaporate uniformly, and creates smooth texture throughout. Inconsistent stirring results in burnt spots and uneven consistency.
Technique 3: Heat Control
Maintaining medium-low heat throughout cooking is essential. High heat causes rapid moisture loss and burning. Very low heat extends cooking time unnecessarily. The moderate temperature allows gradual moisture reduction while developing flavor through gentle caramelization.
Technique 4: Warm Shaping Window
The 2-3 minute cooling period after cooking creates ideal temperature for shaping. Too hot mixture burns hands and becomes excessively sticky. Too cold mixture loses binding ability and develops cracks when shaped. This narrow temperature window produces smooth, crack-free laddus.
Common Problems and Solutions
Problem 1: Laddus Falling Apart
Cause: Mixture cooked too long, becoming too dry, or insufficient sweetener proportion.
Solution: Return crumbly mixture to pan. Add 2 tablespoons condensed milk or regular milk. Cook on low heat for 2-3 minutes while stirring. The additional moisture restores binding capacity.
Prevention: Monitor cooking carefully. Remove from heat when mixture just starts leaving pan sides. Test small portion before removing entire batch from heat.
Problem 2: Sticky, Wet Mixture
Cause: Insufficient cooking time or excessive condensed milk quantity.
Solution: Return mixture to pan. Cook additional 3-5 minutes on low heat while stirring continuously. Moisture will evaporate and proper consistency will develop.
Prevention: Cook until mixture forms cohesive mass and clearly leaves pan sides. Don’t rush the cooking process.
Problem 3: Cracked Surface
Cause: Shaping after mixture cooled too much or applying insufficient pressure while rolling.
Solution: For current batch, gently warm hands and re-roll cracked laddus with firm pressure. For future batches, shape while mixture is optimally warm and apply adequate pressure.
Prevention: Work quickly after cooking. Apply firm, even pressure while rolling to compress mixture and prevent surface cracks.
Problem 4: Uneven Size
Cause: Inconsistent portioning when taking mixture for shaping.
Solution: Use measuring spoon (approximately 1.5 tablespoons) for each laddu to ensure uniform size.
Prevention: Portion all mixture before starting to shape. This allows quick shaping while temperature remains optimal.
Serving Suggestions and Pairings
Traditional Serving: Arrange coconut laddus on decorative silver or steel plate. Can also be placed in small paper or foil cups for individual serving. Serve at room temperature or slightly chilled.
Occasions: Ideal for festivals (Ganesh Chaturthi, Diwali, Janmashtami, Navratri), religious ceremonies, weddings, birthday celebrations, or as homemade gifts during festive seasons.
Beverage Pairings:
- Hot masala chai provides perfect complement
- South Indian filter coffee balances sweetness
- Warm milk for children
- Cardamom tea enhances flavor notes
Complete Dessert Platter: Combine with other Indian sweets like besan laddu, rava laddu, or milk peda for festive occasions.
Storage and Reheating Instructions
Room Temperature Storage: Place laddus in airtight container with parchment paper between layers. Store in cool, dry place for 3-4 days maximum. Not recommended in hot or humid climates as moisture can cause spoilage.
Refrigeration: Transfer to airtight container. Refrigerate for up to 2 weeks. The cold temperature firms texture slightly. Remove from refrigerator 15-20 minutes before serving to bring to room temperature for best taste.
Freezing: Arrange laddus in single layer on tray. Freeze until solid (approximately 2 hours). Transfer to freezer-safe bag or container. Can be frozen for up to 1 month. Thaw at room temperature for 30 minutes before serving.
Note: Coconut laddus don’t require reheating. Serve at room temperature or chilled as per preference.
Nutritional Information
Per Laddu (approximately 25 grams):
Macronutrients:
- Calories: 75 kcal
- Protein: 1.5g
- Carbohydrates: 8g
- Fat: 4g
- Fiber: 1g
- Sugar: 6.5g
Health Considerations:
Coconut provides medium-chain triglycerides (MCTs) which are beneficial fats. Contains dietary fiber supporting digestion. Provides small amounts of iron, potassium, and copper. Moderate consumption recommended due to sugar content. Suitable for vegetarian diets. Not suitable for those with coconut allergies or severe diabetes without medical consultation.
Variations and Adaptations
Chocolate Coconut Laddu: Add 2 tablespoons unsweetened cocoa powder along with cardamom. Creates chocolate-flavored variation popular with children.
Dry Fruit Coconut Laddu: Increase chopped nuts to 1/2 cup total. Add 2 tablespoons chopped dried dates or raisins for natural sweetness and chewy texture.
Rose Coconut Laddu: Replace cardamom with 1 teaspoon rose water. Add 2-3 drops pink food color for traditional pink appearance during festivals.
Jaggery Coconut Laddu: Replace condensed milk with 3/4 cup powdered jaggery and 1/4 cup milk. Provides iron and has lower glycemic index than white sugar.
Sugar-Free Version: Use sugar-free condensed milk or sugar substitute. Replace regular condensed milk with 1/2 cup sugar-free sweetener and 1/4 cup milk. Adjust sweetness to taste.
Frequently Asked Questions
Q1: Can I use only desiccated coconut instead of fresh?
Yes, desiccated coconut works well as complete replacement. Use same quantity (2 cups). Optionally soak in 2-3 tablespoons milk for 5 minutes before cooking to improve texture. Fresh coconut provides superior taste, but dried coconut produces acceptable, convenient results.
Q2: Why do some laddus have cracks on surface?
Cracks develop when mixture is too dry from overcooking or when shaped after cooling completely. Additionally, insufficient pressure during rolling causes cracks. Ensure mixture has adequate moisture, shape while warm, and apply firm, even pressure while rolling to prevent cracks.
Q3: How long can coconut laddus be stored?
Room temperature in airtight container: 3-4 days in cool, dry climate. Refrigerated: up to 2 weeks. Frozen: 1 month. Fresh coconut laddus have shorter shelf life than those made with desiccated coconut due to higher natural moisture content. Always store in airtight container to prevent moisture absorption and maintain texture.
Q4: Can this recipe be made completely vegan?
Yes, with simple substitutions. Replace condensed milk with coconut condensed milk (available at specialty stores) or use 3/4 cup coconut sugar mixed with 1/4 cup coconut milk. Replace ghee with coconut oil or vegan butter. All other ingredients and steps remain identical. Taste and texture closely match traditional version.
Chef’s Notes and Additional Tips
Ingredient Selection: Choose fresh coconut that feels heavy for its size and sounds full of water when shaken. This indicates maximum freshness and moisture content. For desiccated coconut, check packaging date and choose recently packaged products for best flavor.
Seasonal Considerations: In summer months, coconut laddus firm up quickly due to higher ambient temperature. In winter, they may take longer to set. Adjust cooling time accordingly.
Make-Ahead Strategy: Prepare coconut laddus up to 1 week ahead for festivals or parties. Store refrigerated and bring to room temperature before serving. This make-ahead capability reduces last-minute preparation stress.
Scaling Recipe: When doubling recipe, increase cooking time by 3-4 minutes due to larger mixture volume. When halving, reduce cooking time by 2-3 minutes. Stirring frequency and heat level remain constant regardless of batch size.
Quality Indicators: Well-made coconut laddus should have smooth surface without cracks, hold shape firmly without crumbling, have pleasant coconut aroma with cardamom notes, and balanced sweetness that’s not overwhelming.
Conclusion
Coconut Laddu preparation requires attention to moisture balance, proper cooking time, and warm shaping technique. The straightforward ingredient list and simple methodology make this an ideal dessert for cooks at all skill levels.
Success primarily depends on achieving correct consistency during cooking and shaping at optimal temperature. These factors produce laddus with ideal texture that maintain shape without being excessively hard or too soft.
This traditional sweet serves multiple purposes – from festival offerings to everyday desserts, making it a valuable recipe in any home kitchen. The minimal time and effort required produces results that often surpass store-bought versions in both taste and quality.