Paneer Recipe: Fresh Homemade Indian Cottage Cheese in 30 Minutes
Published: March 22, 2026 | Category: Indian Basics | Reading Time: 6 minutes
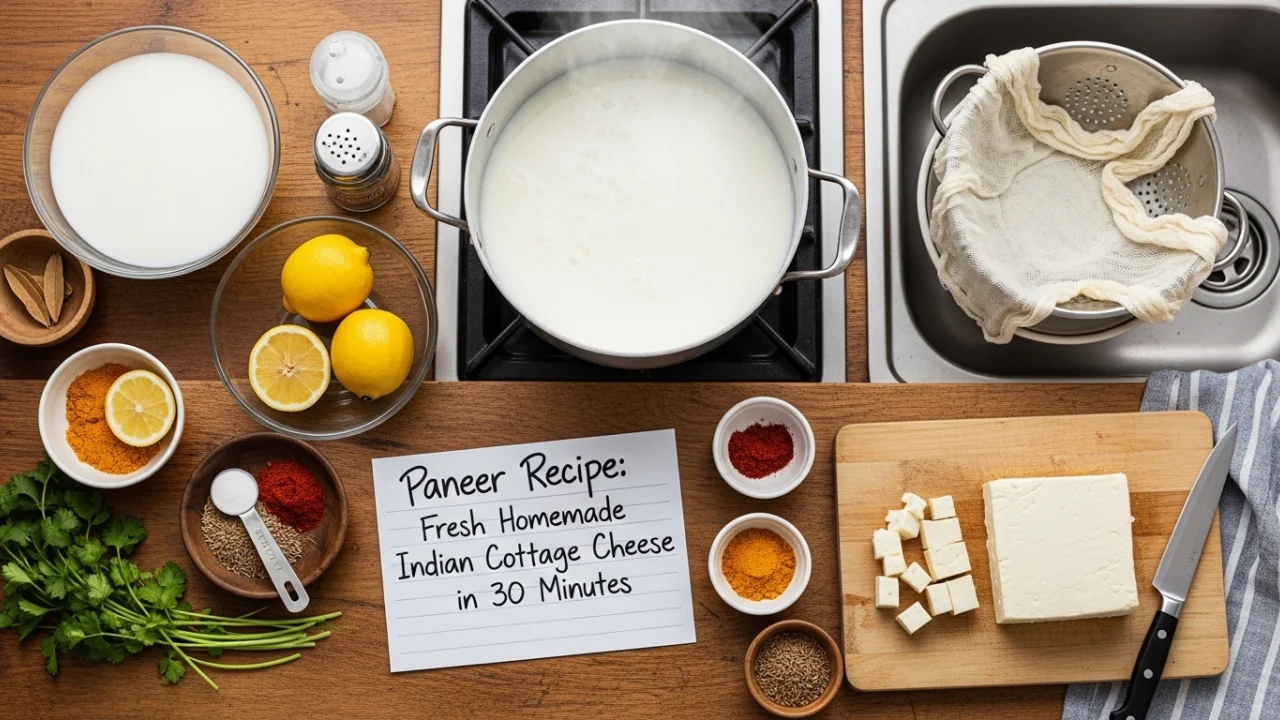
Introduction to Homemade Paneer
Paneer stands as one of the most versatile ingredients in Indian cuisine, serving as primary protein source in numerous vegetarian dishes. This fresh cheese, made by curdling milk with acidic agent, features in popular preparations like Paneer Tikka, Palak Paneer, Shahi Paneer, and Kadai Paneer.
The main challenges in making paneer at home include achieving proper curdling without making milk rubbery, getting the right texture that’s neither too soft nor too hard, preventing paneer from crumbling during cooking, and extracting correct amount of whey. Many homemade versions result in either too soft, crumbly paneer or excessively hard, rubbery texture.
This recipe addresses these issues through specific techniques: correct milk temperature for curdling, appropriate acid quantity, proper whey drainage method, and optimal pressing time. Following these approaches ensures restaurant-quality paneer with ideal texture.
Making paneer at home costs significantly less than store-bought versions and provides fresher, superior-tasting results without preservatives.
Recipe Overview
| Parameter | Details |
|---|---|
| Cuisine Type | Indian |
| Course | Base Ingredient |
| Difficulty Level | Easy |
| Prep Time | 10 minutes |
| Cook Time | 15 minutes |
| Total Time | 30 minutes + setting time |
| Yield | 200-250 grams paneer |
| Calories per 100g | Approx. 265 kcal |
| Dietary | Vegetarian, Gluten-free |
| Estimated Cost | $2 – $3 |
Required Ingredients
Main Ingredients:
- Full-fat milk – 1 liter (Substitute: 2% milk works but yields less paneer)
- Lemon juice – 3-4 tablespoons (Substitute: vinegar or yogurt)
- Water – 1/4 cup (to dilute acid)
- Ice cubes – 4-5 (stops cooking process)
Note: Full-fat milk produces softer, creamier paneer. Low-fat milk creates harder texture and lower yield.
Kitchen Equipment Needed
- Heavy-bottomed pan or pot
- Muslin cloth or clean cheesecloth
- Strainer or colander
- Large bowl
- Wooden spoon for stirring
- Flat plate or board for pressing
- Weight for pressing (approximately 2-3 kg)
Step-by-Step Preparation Method
Phase 1: Milk Preparation
Step 1: Heating Milk
Pour 1 liter full-fat milk into heavy-bottomed pan. Place over medium-high heat.
Stir occasionally to prevent milk from sticking to pan bottom. Heat until milk comes to full rolling boil. Small bubbles will form around edges, then entire surface will rise rapidly.
Temperature indicator: Milk should reach approximately 90-95°C (194-203°F). At this temperature, curdling happens efficiently.
Once boiling, turn heat to low immediately to prevent overflow.
Step 2: Preparing Acidic Solution
While milk heats, mix 3 tablespoons lemon juice with 1/4 cup water in small bowl. Diluting acid ensures even distribution throughout milk.
Keep extra tablespoon lemon juice ready. Some milk batches require slightly more acid depending on milk quality and fat content.
Phase 2: Curdling Process
Step 3: Adding Acid
When milk reaches full boil and heat is reduced to low, add diluted lemon juice gradually while stirring gently.
Stir in one direction using wooden spoon. The milk will start separating into curds (solid white chunks) and whey (greenish-yellow liquid) within 30-60 seconds.
Curdling indicators: Whey becomes clear and greenish. Curds separate completely from liquid. If milk doesn’t curdle completely after 1 minute, add remaining tablespoon lemon juice.
Turn off heat immediately once curdling completes. Over-heating after curdling makes paneer rubbery and hard.
Step 4: Ice Water Addition
Add 4-5 ice cubes or 1/4 cup ice-cold water to the curdled milk. This stops the cooking process immediately, preventing paneer from becoming hard.
Stir gently once. Let sit for 2-3 minutes undisturbed. This allows curds to firm up slightly before draining.
Phase 3: Draining and Setting
Step 5: Straining Whey
Place muslin cloth or cheesecloth over large strainer positioned above bowl. The bowl collects nutritious whey which can be saved for other uses.
Pour the curdled milk through cloth carefully. Hot whey will drain into bowl below while curds remain in cloth.
Whey uses: Don’t discard whey. Use in dough for rotis, in dal cooking, or drink as protein-rich beverage after cooling.
Step 6: Rinsing Curds
Once whey drains, hold cloth edges and rinse curds under running cold water for 30 seconds. This removes excess lemon taste and stops acidic reaction.
Gentle rinsing also cools down paneer, making it easier to handle in next steps.
Step 7: Removing Excess Moisture
Gather cloth edges and squeeze gently to remove excess water. Don’t squeeze too hard as this makes paneer too dense.
The curds should be moist but not dripping water. Proper moisture content creates ideal texture – not too soft, not too hard.
Step 8: Shaping and Pressing
Place the cloth-wrapped paneer on flat plate or cutting board. Flatten into rectangular or square shape approximately 1-2 inches thick.
Fold cloth edges over paneer neatly. Place another plate on top. Add weight (2-3 kg) – use filled water bottle, heavy pot, or mortar-pestle.
Pressing time guide:
- 15-20 minutes: Soft paneer for gravy dishes
- 30-40 minutes: Medium-firm for general use
- 45-60 minutes: Firm paneer for frying, grilling, tikka
More pressing time extracts more moisture, creating firmer texture.
Step 9: Final Steps
After pressing duration, remove weight and cloth. The paneer block should hold shape without crumbling.
Cut into desired shapes – cubes for curries, rectangles for tikka, or keep as block for grating.
Use immediately or store properly.
Professional Techniques and Tips
Technique 1: Milk Quality and Temperature
Full-fat milk (minimum 3.5% fat) is essential for soft, creamy paneer. The milk must reach full rolling boil before adding acid. Insufficient temperature results in incomplete curdling and lower yield. The 90-95°C temperature ensures proteins denature properly for complete separation.
Technique 2: Acid Selection and Quantity
Lemon juice produces mildest-tasting paneer. Vinegar works faster but can leave slight taste. Yogurt creates softest paneer but takes longer to curdle. Start with 3 tablespoons acid per liter milk and add more only if needed. Excess acid makes paneer sour and can create grainy texture.
Technique 3: Ice Water Addition
Adding ice water immediately after curdling is professional technique often skipped in home recipes. This sudden temperature drop stops cooking process, preventing proteins from over-coagulating. Result is softer, more tender paneer compared to versions that continue cooking in hot whey.
Technique 4: Pressing Duration Control
Pressing time determines final texture. For dishes requiring soft paneer that absorbs gravy (like Shahi Paneer), press for just 15-20 minutes. For grilling or frying applications (like Paneer Tikka), press for 45-60 minutes to create firm texture that holds shape during cooking.
Common Problems and Solutions
Problem 1: Milk Doesn’t Curdle Properly
Cause: Insufficient heat, inadequate acid quantity, or UHT processed milk.
Solution: Bring milk back to boil and add 1 more tablespoon lemon juice. If still not curdling, milk quality may be issue – UHT milk sometimes resists curdling.
Prevention: Use fresh, full-fat milk. Ensure milk reaches full rolling boil before adding acid. Add acid gradually while stirring.
Problem 2: Paneer Too Hard or Rubbery
Cause: Excessive heating after curdling, too much acid, or over-pressing.
Solution: For current batch, soak hard paneer in warm water for 15 minutes before use to soften slightly. For next batch, turn off heat immediately after curdling and reduce pressing time.
Prevention: Add ice water after curdling. Don’t boil after adding acid. Press for shorter duration.
Problem 3: Paneer Crumbles or Too Soft
Cause: Insufficient pressing time, using low-fat milk, or inadequate curdling.
Solution: If paneer is too soft, place back under weight for additional 20-30 minutes. For cooking, handle gently and avoid vigorous stirring.
Prevention: Use full-fat milk. Press for adequate duration based on intended use. Ensure complete curdling before draining.
Problem 4: Low Yield
Cause: Using low-fat milk, incomplete curdling, or excessive rinsing.
Solution: No remedy for current batch. For next batch, use full-fat milk and ensure complete curdling before draining.
Prevention: Full-fat milk yields approximately 200-250 grams paneer per liter. Don’t over-rinse curds as this washes away some proteins.
Usage Suggestions
For Curries: Cut into 1-inch cubes. Use directly in gravies like Paneer Butter Masala, Palak Paneer, or Kadai Paneer.
For Tikka/Grilling: Press for 45-60 minutes to get firm texture. Cut into rectangles, marinate, and grill or bake.
For Frying: Firm paneer works best. Cut into desired shapes and shallow or deep fry until golden.
For Salads: Soft-pressed paneer can be crumbled over salads. Adds protein and creamy texture.
For Desserts: Very soft paneer (pressed 10-15 minutes) works in sweets like Rasgulla or Sandesh.
Storage Instructions
Room Temperature: Fresh paneer can sit at room temperature for 2-3 hours maximum in cool weather.
Refrigeration: Submerge paneer in water in airtight container. Refrigerate for 3-4 days. Change water daily to maintain freshness.
Freezing: Cut into portions, wrap individually in plastic wrap, then place in freezer bag. Freeze for up to 2 months. Texture becomes slightly crumbly after thawing but works fine in cooked dishes.
Usage tip: Bring refrigerated paneer to room temperature before cooking for better texture.
Nutritional Information
Per 100 grams:
- Calories: 265 kcal
- Protein: 18g
- Fat: 20g
- Carbohydrates: 1.5g
- Calcium: 480mg (48% Daily Value)
- Phosphorus: 245mg
Health Benefits: Excellent protein source for vegetarians. High in calcium for bone health. Contains conjugated linoleic acid (CLA). Rich in vitamin B12. Supports muscle building and weight management when consumed in moderation.
Variations
Soft Paneer: Press for only 10-15 minutes. Use in desserts or soft curries.
Firm Paneer: Press for 60+ minutes. Ideal for grilling, tikka, or dishes requiring paneer to hold shape.
Flavored Paneer: Add crushed black pepper, cumin powder, or herbs to curds before pressing for seasoned paneer.
Tofu-Style Paneer: Press for extended time (2+ hours) under heavy weight for very firm, tofu-like texture.
Frequently Asked Questions
Q1: Can low-fat milk be used to make paneer?
Yes, but yield will be lower and texture firmer. Low-fat milk produces approximately 150-180 grams paneer per liter compared to 200-250 grams from full-fat milk. The paneer will be less creamy and more prone to becoming rubbery. For best results, use minimum 3% fat milk.
Q2: What can be done with leftover whey?
Whey is protein-rich and nutritious. Use in kneading dough for rotis or parathas for added nutrition and softer texture. Add to dal while cooking for enhanced protein. Use in soups or gravies as liquid base. Drink cold with pinch of salt as protein beverage. Don’t discard this valuable byproduct.
Q3: Why does homemade paneer taste different from store-bought?
Homemade paneer is fresher without preservatives or additives. Store-bought versions often contain citric acid, stabilizers, and preservatives affecting taste and texture. Homemade version has cleaner, milkier taste. Additionally, freshness makes significant difference – homemade paneer made same day tastes superior.
Q4: Can paneer be made without pressing?
Pressing is essential for paneer to hold shape. Without pressing, curds remain loose and crumbly, unsuitable for cutting or cooking. Minimum 15-20 minutes pressing required for basic cohesion. Only exception is when making crumbled paneer for specific dishes where texture doesn’t matter.
Conclusion
Homemade paneer preparation requires attention to milk temperature, proper curdling technique, and appropriate pressing duration. The simple ingredient list and straightforward method make this accessible for regular home preparation.
Success depends primarily on using quality full-fat milk and controlling pressing time based on intended use. These factors produce paneer with texture matching specific cooking requirements – from soft and creamy for gravies to firm for grilling.
Making paneer at home provides cost savings, better quality, and satisfaction of creating fresh ingredient from scratch. Once basic technique is mastered, the process becomes quick routine requiring minimal effort.